You are here
Soil pH
Soil pH examines the degree of soil alkalinity or acidity. Soil pH measure the H+ concentration in the soil solution. Soil acidity, or the reaction of the soil, indicates if there are free Aluminum ions (Al+++) or Hydrogen (H+) in the soil solution. Both types of ions can affect plant growth by inhibiting root growth or diluting the other cations (i.e., nutrients such as Ca++, Mg++, K+, Na+) in the soil solution and making them less available for uptake by the plant. In general, soils with a pH in water less than 5.5 (or 6.0) are considered acidic, those with pH great than 7.2 are considered alkaline, which may also affect plant growth by making other nutrients less available. It should be noted that some plants, even crops, are more tolerant of soil acidity than others.
How to operationalize the metric
Method of data collection and data needed to compute the method:
The following method has been taken directly from the SoilDoc Manual (Excerpted from Weil and Gatere, 2016, pp 33 - 41)
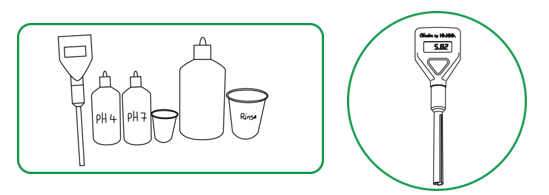
Figure 5. Calibration of the pH meter:
The calibration procedure described in the figure below should be followed. In general, calibration requires the use of two buffer standards (solutions) of known pH, bracketing the expected range of pH for the soils to be measured. For most acid soils, buffers of pH 7.0 and pH 4.0 will be adequate to calibrate the pH meter.
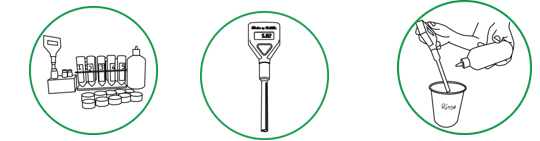
Materials/Instruments:
- Hanna Instruments pH meter
- pH meter checker (Hanna Instruments: HI 1270 pH electrode with screw-type connector: http://www.hannainstruments.co.uk/ph-electrode-for-use-with-checker1.html)
- (2) 1.5V alkaline batteries
- pH 4 buffer solution in 120ml dropper bottle
- pH 7 buffer solution in 120ml dropper bottle
- 30ml beaker
- Centrifuge tube
- 500ml squirt bottle filled with bottled water
- 250ml rinse beaker
Directions for calibration:
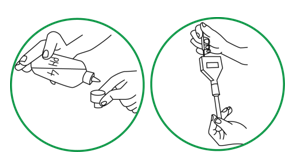
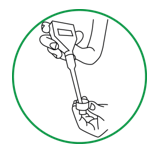
Step 1.Remove protective black cap from pH meter electrode. Rinse pH electrode by squirting it with bottled water over the rinse beaker. Shake excess water from pH electrode. Add 10 drops of pH 7 standard solution to the cap of dropper bottle (120ml) and immerse the electrode tip into the pH 7 buffer solution in cap, making sure that the solution covers the slit up the side of the tip. Turn on the pH meter. Do not calibrate the probe by directly measuring standard solution in dropper bottle.
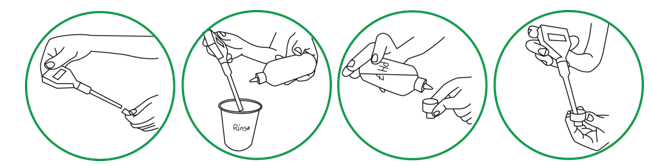
Step 2. The meter should read between 6.70 and 7.30 within a few seconds. Wait until the reading stabilizes. Adjust meter using a small screwdriver to turn the screw at top of the meter. Use very small, careful movements. Turn clockwise/counterclockwise until the LCD display reads 7.00 pH.
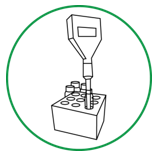
Step 3. Set aside cap of pH 7 solution on the vials holder (see figure below). Do NOT discard the solution.
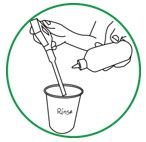
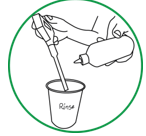
Step 4. Shake off any drops of pH 7 buffer solution clinging to it and then rinse it thoroughly with bottled water

Step 5. By squirting electrode tip over rinse beaker. Squirt bottled water up into the end of probe to flush any remaining pH 7 solution from around bulb. Shake off excess water over rinse beaker. Rinse three times. Add 10 drops of pH 4 buffer solution into the cap of the pH 4 buffer dropper bottle and insert clean pH electrode into it. The reading on the meter should be within 3.7 to 4.3 within a few seconds. Allow the reading to stabilize. Once reading is stabilized, adjust to read 4.00 using the screwdriver on screw labeled “4/10” using small, careful movements.
Step 6. After you finish, discard the pH 4 buffer solution into a rinse beaker. Rinse out the cap and re-cap the buffer solution dropper bottle and put it in toolbox.
Step 7. Rinse the electrode as described in Step 1.
Step 8. Immerse tip of probe in pH 7 calibration solution that was aside in Step 1. The reading should be close to 7.00. Put the pH 7 solution in a glass vial, rinse the cap and re-cap the pH 7 dropper bottle.
 Step 9. Rinse the pH electrode, beaker, and meter cap before moving to the next step
 Step 10. Store the pH electrode in a vial with a few drops pH 7 calibration solution until ready to sample soil solution. (Never store the meter in bottled water. Occasionally some of the storage solution will creep out and appear as dry white crystal residue on the electrode. It will dissolve when you rinse it with bottled water.)

Figure 6. Measuring soil pH from a water extract
Materials/Instruments:
- pH meter (Hanna Instruments)
- pH meter Checker (same as previous figure)
- Soil samples in centrifuge tubes
- 500ml squirt bottle filled with bottled water
- 250ml rinse beaker
- pH electrode holder
Directions for testing pH of soil samples:
Step 1. Rinse pH electrode by squirting it with a stream of clean bottled water over rinse beaker.
Step 2. Measure and record the pH of the blank (tube 10). Rinse the pH electrode over the rinse beaker.
Step 3. For soil sample, immerse pH electrode tip into supernatant (water) above soil slurry. Stir the mixture gently.
Step 4. Use the pH electrode holder to let the meter rest on the edge of the tube so that the sensor is not resting on the soil in the tube.

Step 5. Wait until the reading on the LCD screen stops fluctuating. (Consider the reading stable when there is no change or only up and down change for four seconds.) Record the pH. Equilibrium may be considered reached when the pH measured does not vary by more than 0.02.
Step 6. Clean the pH electrode by squirting the electrode tip with water over rinse beaker.
Step 7. Repeat Steps 3-6 for each sample.
Step 8. When finished with the pH meter, put in the vial with pH 7 solution. Don’t forget to turn it off, as there is no auto-off function.
 (Above method excerpted from Weil and Gatere, 2016, pp 33 - 41)
Unit of analysis:
Content here
Limitations regarding estimating and interpreting:
Content here